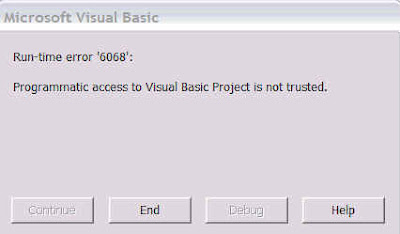
Problem: "Run-time error '6068” : Programmatic Access to Visual Basic Project is not trusted" while downloading Earlywatch Report from Solman.
Solution:
1. Open the Office 2003 or Office XP application in question. On the Tools menu, click Macro, and then click Security to open the Macro Security dialog box.
2. On the Trusted Sources tab, click to select the Trust access to Visual Basic Project check box to turn on access.
3. Click OK to apply the setting. You may need to restart the application for the code to run properly
Refererences: http://support.microsoft.com/kb/282830
# Please spare some time to put a comment, if this post was relevant for you or you still need help. We shall reply to your queries.
Friday, March 13, 2009
. Configuring Email Alerts for Backup Jobs
For configuring email alerts for Backup Jobs first you need to configure either SQL Mail or Database Mail in SQL Server 2005.
Database mail is newly introduced concept in SQL Server 2005 and it is replacement of SQLMail of SQL Server earlier version. Database Mail has many enhancements over SQLMail. We are configuring database mail.
Configuring Database Mail
1. Login to SQL Server Management Studio.
2. Expand the tree named ‘Management’.
3. Double click on Database mail.
4. Select the first option for configuring Mail profile and accounts.
5. Write down Profile Name and Description and click on the Add button for creating new account.
6. Fill up the details as seen in the screenshot.
7. Click Next and Finish.
Now Database mail has been configured.
Activation of Database Mail
For activation of database mail open a New Query window. Run the following queries.
Send Test Mail
For sending Test Mail open a New Query Window. Run the following script.
Check the status of the sent mails
To check the status of the sent mails run the following queries.
SELECT *
FROM sysmail_mailitems
GO
SELECT *
FROM sysmail_log
GO
Configuring Backup Jobs
Right click to the existing job for which you want to configure the mail alerts and go to the properties.
In the Notification tab there is a concept called Email. Don’t get confused, it is only be activated when we configure SQL Mail. As we are using Database mail we have to configure the job in a different way.
1. Go to the Step, Click on the New Button.
2. Add the New step as described below. (Change the system Name and Description accordingly.)
3. Now go back to the original Job step and open it in the edit mode.
4. Go to the advanced tab.
5. Change the action on failure. Change it to the Go to Next Step. (Don’t change it to ‘Go to Step n….)
6. Click Ok -> Ok for confirmation.
7. Job Alerts has been scheduled.
Labels:
Batch Jobs
Subscribe to:
Posts (Atom)